![]()
![]()
![]()
![]()
![]()
![]()
![]()
![]()
![]()
![]()
![]()
![]()
![]()
![]()
How to realize personnal sound files
Create your own WAV, your own MP3, or your CD
There is not very ready method to transform a Midi file into soundfile (WAV file or other). The process is rather complex, depends on your installation, and always does not give a satisfactory result.
We will try to present a simple method, with as much of explanation than possible. From file WAV obtained, it will be then easy to create MP3 or to even burn CD.
The PC don't 'play' MIDI, it subjects this request to a synthetizer
For this reason there is not program done everything making it possible to create a file its starting from the Midi file. It is not the work of the processor of the PC, but well that of the synthetizer, external, internal (mounted on the mother board), or placed on a soundcard dedicated.
On the other hand, it is possible to ask the chart-soundto record what forwards since the synthetizer towards the chart, and to create a file of sound of it.
The operation is thus solved with the following step: the PC 'play' the MIDI file, and it record what is generated by the synthetizer.
It is necessary for that to have a software of recording. The "recorder" of Windows is completely insufficient. It makes it possible to record only a few seconds, and does not allow any adjustment.
The soundcard specific are generally provided with a recorder very powerful. There are also recorders provided with certain software of treatment of the sound (Nero, Soundforge...) but this software is not free.
There is only one free software, to my knowledge, there acts of 'Audacity'. The examples given on this page are drawn from this software.
The quality of the transcription will depend on your synthetizer
A synthetizer does nothing but interpret orders. The result will be different according to your installation. A small synthetizer assembled on the mother board will not render, and by far, similar results to a top-of-the-range keyboard of a value of 1000 € or more. But the quality of the synthetizers provided in series with the PC increased considerably. With a modern PC, you can thus await a result more than correct.
You can listen to the results obtained on my installation (Creative chart ' Live! 5.1) on the MP3 page.
The results also depend on the soundfont used. The soundfont is the true alphabet used by the synthetizer. If your synthetizer accepts the soundfonts in format sf2, you can download the bank Espace-Midi.sf2 version 2.1 (12 Mo) which is optimized for classical music.
After this long preamble, let us see how to proceed
All would be simple if there were not item 3, where it will be necessary to grope before obtaining a correct result.
Nothing very difficult, but it is necessary that your PC is perfectly quiet during the recording. Any sound emitted by the PC will be recorded. Thus think of closing your mailsoftware, avoid any connection of equipment USB which would send a small undesirable
ding-dong.According to the power of your PC, you will need all the resources of the processor and the discs. Thus think of disconnect the principal tasks which need ressources, the screensaver (especially if it is sound), the automatic updates, and all the automated jobs (antivirus scan or autosaving).
Also think that the generated file is very bulky (10 Mo per minute). You must thus have a partition with a sufficient place (sometimes double of place, according to the software used). If you doubt the power of your PC, avoid also a too fragmented disc.
All does that seem complex ? Not as much as that. On a powerful PC, these measures are useless. And so even an inopportune task was occuring, it would be enough for you to start again the operation.
3 - Let us start the adjustments:
First, it is necessary to regulate your synthetizer (your Midi card) to generate a sound of better possible quality: good balance of bass and trebble, no saturation of the sound (I advise you to regulate the level of Midi towards 70 %). These adjustments depend unfortunately on each configuration, and it is not possible to say some here. Simply, the sound that you hear by carrying out one Midi must be pleasant and natural.
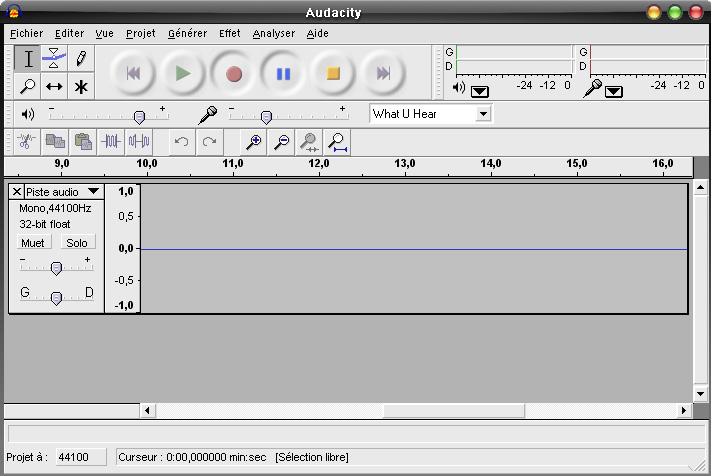
Let us pass to the Audacity software.
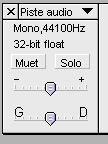
Notice initially the left framework:
Obviously, it is initially necessary to activate the menu 'File -> preference', to select a stereo recording
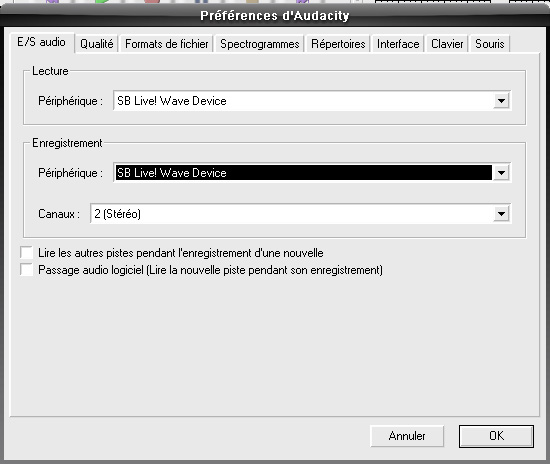
The peripherals of reading and recording will depend on your installation. It is necessary to choose that which corresponds to your Midi synthetizer.
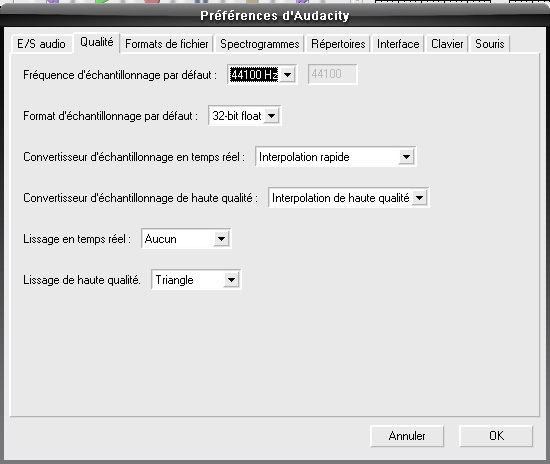
In this 'quality' tab, the first 2 boxes are important. The frequency of 44100 Hz corresponds to the quality of a CD, just as the format of sampling.
Still notice in the bar of tool, the drop menu containing "What U Hear". Click on this box:
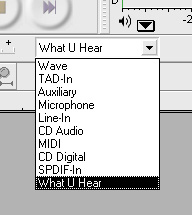
You see appearing all the channels of your soundcard. The list will depend on your material. You can choose ' Midi' directly but if the possibility exists, the choice of "What U Hear" makes it possible to record the total exit of the soundcard, with all the adjustment of reverberation, of chorus, equalization, or any other adjustment authorized by your card, downstream from the synthetizer.
Before launching the recording, it is advisable to carry out preliminary tests. Open the Midi player (Windows Media Player, Media Player Classic, Winamp, or any other program), select the Midi file to encode.
As much as possible, reduce the window to visualize the two programs simultaneously.
Click on the record button in Audacity (red button) - you do not trouble about the white at the beginning of recording, it will be easy to remove it thereafter. Then launch the play of Midi.
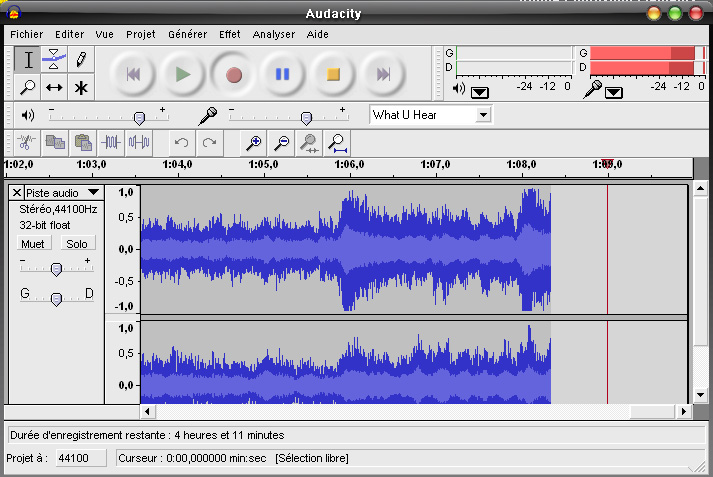
You visualize the recording in progress then. In the right corner, you can see the Vu-meters. The red bar all on the right indicates the maximum of volume reached. If it is located almost at 0 dB, that means that the sound risk to saturate. Start again by slightly decreasing the volume located beside the icon 'micro'
During these preliminary tests, do not hesitate to move the adjustments, to find the point of maximum volume, and to limit it to -5 dB do not use, if your program allows it, of automatic adjustment of volume, the behaviour with classical music, where the dynamic changes are very important, is very ugly.
Close the project, without saving it. Note all the adjustments which you made.
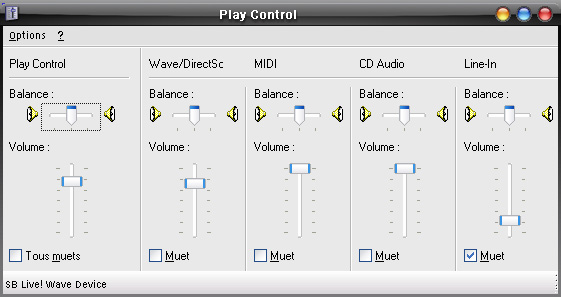
Note: the general adjustment of volume, which appears generally on the left in in a window such as below, does not influence the recording. It is only the adjustment for loudspeakers:
Open a new project, reset the 'MIDI player', and start the recording on Audacity
With new, you do not trouble the length of the white, they will be removed later on.
6 - Await the end of the execution
Click for that on the orange square of Audacity
Click on ' File - > to export in WAV' or ' save as MP3 '
You can now listen your to your file (button with green arrow), or to work it over again, by removing the white. This operation is as simple as with a text editor: your must select select a part of the file, then to cut it.

In this example, the cursor was positioned to 5 seconds, then ' Edit - Selection - > from beginning until the cursor'. It any more but does not remain to cut the selected part.
All does this seem to you long and complex? The first time, it is certain. Certain parameters should be tested, it is necessary to adapt what precedes with other software or hardware, but once the method included/understood, it is simple to implement.
If you wish to realize CD, it is wise to comply with certain rules concerning the duration of blanks between tracks.
Here some general tips
- at the beginning of beach, insert a one second blank
- at the beginning of first track, insert a three second blank
- at the end of the track, insert a ten second blank
- if the track forms part of a work made up of several movements, the ten seconds are reduced to six seconds - but always 10 seconds for the last movement.
- the last track of CD is followed of a three second blank.
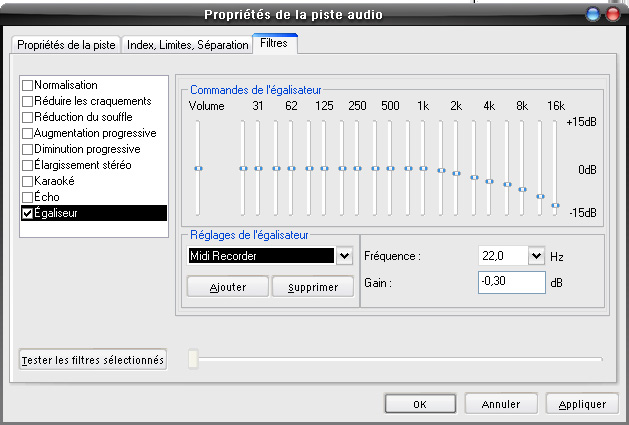
Note concerning the use of an equalizer
The Midi rendering is still well far from that of a real execution, burned on CD. To give more realism to CD, it is necessary to 'equalize' the WAV file. Again, the parameters depend on the souncard and its adjustments. The search for a good sonority is long and tiresome.
I propose to you here the personal adjustments, obtained on the burning Nero software :
Important remark : Audacity proposes the option 'Generate MIDI'. This option is not implemented yet in the current version. It was planned for 2004-2005. It will thus be necessary to wait a little.
![]()